Thursday, March 31, 2011

Chocolate Covered Frozen Bananas

One summer evening, years ago, my friend, Gretchen and I were taking an after dinner stroll.  It was a nice evening and, as we came upon the cross street, we saw a convertible approach the traffic light.  It was perfect convertible-weather.  We were admiring their ride from afar, and noticed that both of the passengers were eating some yummy chocolate-colored confections on a stick.  About that time, the light changed to green and off they went.  Gretchen and I put on our thinking caps, determined to find ourselves some of those treats!  (This is fitting since she is an investigator and I love to problem solve- Dave lovingly calls me "Encyclopedia Jules"and we both love dessert!)  We began to think about proximity.  They had to have been purchased nearby, as it looked like a frozen treat they were eating.
Since there were no ice cream or popsicle shops nearby, we decided to stop into the cute neighborhood market that was across the street.  We walked around the store, searching for what they had.  We found the frozen case, saw ice creams of various flavors and then we saw it! Diana's Bananas.  A chocolate covered frozen banana on a stick.  YES!  This must be it!  And they came in several varieties. 

We were then faced with the challenge of deciding if we should get banana babies or the full size; milk or dark chocolate;  with chopped peanuts covering the outside or plain!  It's fuzzy in my mind which we chose that night, since it was long ago, but I  think we went for the dark babies and the peanut covered ones too.  I think we knew we would be coming back for more to give equal opportunity to them all!  As we were enjoying the treats, we quickly determined that these would be very easy to make, at much less cost, and could customize them.  So, we did, and I have been making them ever since.  
The frozen banana has the texture of ice cream, but is far healthier.  I haven't seen the Diana Bananas in stores in years, but I found them online and they seem to be alive and kicking!  


The recipe is super simple.
4 bananas- ready to eat: not too ripe, not green
1 cup semi sweet chocolate chips
1 Tbsp butter or canola oil
Toppings: sprinkles, chopped pecans/peanuts/almonds and/or toffee bits
8 Popsicle sticks
(of course you can alter the quantities to your needs/supplies)

Peel and cut bananas in 1/2.  Gently insert popsicle sticks into the flat side.
Place on a parchment lined baking sheet and place in freezer for 15 minutes or so.
Meanwhile, melt 1 cup chocolate chips and 1 Tbsp butter or canola oil in a microwave oven by 30 second increments stirring in between until melted and smooth.  Prepare dishes with toppings (if so desired)  Remove bananas from the freezer and gently smooth chocolate over each banana, one at a time, covering completely. While the chocolate is still wet, roll in topping to coat evenly.  Place back on the parchment lined pan and return to the freezer for several hours until bananas are frozen solid.  After frozen, you may place them in a sealed container to keep in the freezer for serving at a later day.  Or you can gobble them up immediately!

They are a hit with kids and adults alike.


dipped and coated

frozen chocolate covered bananas!

the inside view


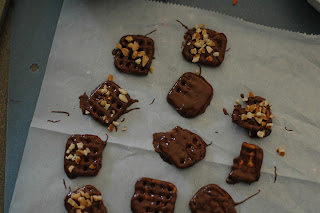
If you find that you have extra chocolate, I believe you have two options:  lick the bowl with a really good rubber spatula or throw something in that bowl to dip and coat...like these pretzels. Yum!


Thursday, March 24, 2011

Pack Your Picnic

The grass is growing, the trees are budding, flowers are blooming and the sun has been shining!  Spring has come and we are so very thankful. My kids and I have had the same reaction:  "Let’s have a picnic!", or as my 3 year old says, a “Pic-a-nic!”  Yes, lets! What a fun event (especially before the bugs are out in full force).  I am a picnicker.  Though, I must admit that picnics are at times, a pain to pack (especially the 90th one I pack at the end of summer, when headed to another day ((or evening)) at the pool), but they are a great way to make a meal from home feel like an event.

When I was a kid I remember picnicking under the dining room table when the weather outside didn’t allow.  It took us a lot of time to get it all prepared and packed up, only to step 6 steps into the adjacent dining room to eat the picnic.  But the memories are fresh in my mind, so I guess they were worth the effort.

I don’t know what menu you imagine for picnics, but I really prefer a picnic to be a collection of yummy foods, laid out on a blanket or picnic table, and then plated right then and there, rather than individually packed meals.  Maybe one reason is because I’m usually not in the mood to pack 4 or 5 meals to please 4 or 5 opinionated eaters.  Another reason is because, you never know when another friend might join the festivities, and it is far easier to share when serving from a common buffet. Not to mention, it simply feels like a picnic feast, which I love.

Two of my favorite picnic treats are homemade pimento cheese with crackers and barley salad.

Now when I say pimento cheese,  I’m not talking about that gummy, processed cheese product with red chunks in it, which grosses some people out.  I am talking about fresh, grated, sharp cheddar cheese, light mayo, pimentos and some kick added.  It is yum-my! (not gum-my).

And the barley salad is what Dave calls “a very pleasant surprise”.  It is pretty and fresh and flavorful and healthy.  It makes a great side dish for dinner and is perfect for a lunch on the go. I used to make this as rice salad, but last year when I discovered the high fiber content in Barley, I made the switch.  Barley is inexpensive, easy to prepare and is a lot like brown rice.

My kids often request turkey or peanut butter at a picnic, so I usually pack up some bread, crackers, fruit, turkey slices from the deli, and can put the meal together on location.

Here are the 2 recipes:

Pimento Cheese                                                     
4 cups grated, sharp cheddar cheese                  

1/2 cup light mayo, or more (to your taste)          

1 (2oz.) jar diced pimentos, drained

salt, pepper, cayenne pepper and hot sauce to taste


Stir the cheese and mayo together with a fork until well coated.  Add pimentos and combine well.  Add spices little at a time to get the desired flavor. Keep refrigerated. 


salad:
2 cups pearled barley
1 cup dried cranberries (or currants)
1 yellow, red, or orange bell pepper, finely diced
1/2 cup red onion, finely chopped
1 cup fresh spinach, chopped
1/2 cup slivered almonds,  toasted
1/2 cup feta cheese, crumbled

dressing:
2 Tbsp honey
1/4 cup lemon juice (the juice of one large lemon)
1/4 cup red wine vinegar
1/3 cup olive oil

Salt and Pepper to taste


Prepare barley as directed on the package.
While it is cooking:


Chop and prepare the pepper, onion, spinach, and almonds.
In a jar, or measuring cup, mix the honey, lemon juice, vinegar and olive oil together.  
When barley is cooked, add cranberries, peppers, onion, spinach, almonds and feta (and whatever else you want!)  Pour dressing over, a little bit at a time.  You should not need all of the dressing.  Use what you need and stick the rest in your fridge to dress the next salad you make.  Combine all of the ingredients well.  Add Kosher Salt and fresh ground pepper to taste.
Serve at room temperature or cold.  Keep leftovers in the fridge.


Thursday, March 17, 2011

Repurposing Jars

I have an affinity towards glass jars.  They are a favorite of mine.  They embody so many things I appreciate:  they can be repurposed, they are versatile, they are practical, they are vintage, classic, and they are free (or paid for when purchasing pasta sauce and jam).

As I looked around the other day, I realized that I use jars in so many ways all over my house:
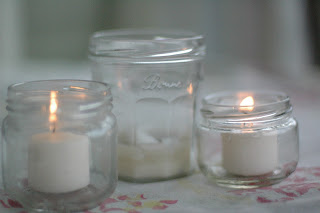
It all started with votive candles.  Jam jars became pretty, vintage, free candle holders on the dining room table and on the front porch. 

Since I like to recycle, and our city’s curbside recycling doesn’t pick up glass, I began to collect glass jars under the kitchen sink to re-use or take to the recycle drop off center.  I dig into the pile when I need a jar to use for something and take the rest to the drop off periodically.  (Which, by the way, my kids love.  There is something about it- throwing glass into large metal dumpsters-the loud crashing glass, and the renegade feeling, while actually being environmentally responsible, that makes it a big event at our house).  So I recycle some and save some for repurposing.

I must say that some jars are prettier than others, and some are more useful in size than others.  Sometimes, Dave asks me if I really need all these jars, that are pouring out of my our cabinet.  I try to explain that I really do try to sort and recycle every couple of months, but some I must keep.  I sometimes feel the urge to defend each jar's potential future use to him.  After all, there are times that I even choose to buy a certain jar of jam because the jar is so pretty and I think it would be great to repurpose!

Jars can be used for so many different things.  You never know when you might need one! Some of my favorite uses are:
to hold flowers- fresh


and dried


and office supplies: clips and erasers in the drawer, 


pens, Sharpies & pencils


 water for painting


and homemade salad dressings


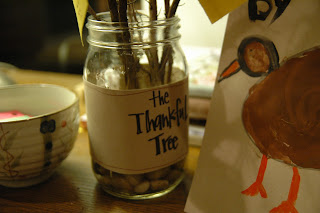
and thankful trees


and even pink lemonade!


A couple of my students have been bringing their iced tea and chai to class in a glass jar with the lid securely screwed on for safe travel.  How fun is that?- the retro travel mug!

So, before you ditch that jelly jar, pasta jar, pimento jar (one of my favorites)- think again- it might have a great purpose.


Thursday, March 10, 2011

What’s A Strata?

Surprise…Pop Quiz today!

Define each of the following terms:
Strata-
Quiche-
Breakfast Casserole-
Frittata-
Omelet-

I just gave a test last week to my social work students and there was a "definitions section".  It's always a challenge to determine the most effective way to test the definition of terms.
I could provide the word and they supply the definition, which seems like the most difficult for the student, but also for me, because I then have to decide, more subjectively, how complete the definition is;
OR I can provide the definition and they supply the word, which is far more objective, making the grading much easier. Unless that is, of course, if a student gives an answer that could be true, though not my intended term.  So then I'm led to the question of a word bank- to provide or not provide. I'll stop. This has nothing to do with your kitchen.

I'll just say, it is a good thing the test was not on Egg Dishes, because as I have discovered, the terms are not so easily defined. 

A couple of weeks ago I was co-hosting a baby shower with my friend, Jessica, for our friend, Alyson, who is in our women’s Bible Study.  You know how I feel about the necessity of baby showers!  Read this post if you don't know, and want to know.

It was a brunch- my favorite meal! I was in charge of making an egg dish.  I really like eggs.  In fact, I have grown to like them more and more over time.  I think because I have had some really nicely prepared eggs in the past few years that have endeared me to them. Also, because I continue to like meat less and less, I think it’s my body’s way of telling me to find some protein. (I have been working on another post about simple breakfast eggs that I will share soon).

But eggs for a crowd can be tricky- especially since something like a quiche is impractical for a crowd of 15 people. So I started poring through my cookbooks and notebooks, looking at my favorites and trying to find the perfect dish.


I began to get really confused about all of these terms: Strata, Quiche, Breakfast Casserole, Frittata.  Do you know the definition?  I thought I did, but with each page I read, it became clear that it's not very clear.  I realized that the only thing consistent in any of the definitions from source to source, was that every one of the dishes, in every one of the recipes I found, had eggs in them. (And almost all have some type of milk in them too).  That’s it!  Well, thanks a lot!

I finally decided to go with a recipe that I have had success with in the past.  I chose to call it a Strata because it just sounds more swanky than a breakfast casserole.  You can make it with ground sausage, which I have done in the past or, with spinach and sun-dried tomatoes, like I did for this shower- which is more Alyson’s style (and mine).  And it worked! Yum!  My friend Melissa S., who was at the shower, called it "Silky Spinach Sundried-tomato Swiss Strata"! How’s that for alliteration?


I don’t know where I originally got the recipe, but according to my notebook where it’s written, it was in 2004.  I have changed a good bit of it, so I guess I can now call it mine, right?  This recipe is full of rich dairy products, so it is a splurge! But it is lovely for a special occasion- silky and savory.  It serves a crowd, isn’t too heavy, and doesn’t feel like you’re eating soggy bread (which is my complaint with some breakfast casserole dishes).  You could serve it for dinner with a simple green salad and have a filling, lovely meal. 

Next time I make it, I want to add even more veggies-maybe zucchini and mushrooms.  I think the trick is cooking the vegetables and removing the liquid before adding them to the dish, so as to prevent watery Strata. 


2 cups shredded Swiss cheese
1/2 lb. medium pork sausage
OR for vegetable version:
 ¾ cup sun-dried tomatoes
1 bag fresh spinach
1 clove garlic
1 Tbsp olive oil
1 French baguette, thickly sliced
1 cup shredded Parmesan cheese
7 eggs
3 cups whipping cream
2 cups skim or 1 % milk
¼ tsp. dried sage
1 tsp. salt
1 tsp. ground dry mustard

Cook sausage and drain (or sauté veggies in oil). 
Place bread slices in a greased 13 X 9 glass dish.
Layer sausage (or veggies) on top of bread, then Swiss cheese, then Parmesan cheese
Wisk 5 eggs, 2 cups cream, and next 4 ingredients together until well combined
Pour evenly over cheese
Cover and chill for 8 hours (or over night)
Wisk 2 eggs and remaining 1 cup of cream together
Pour evenly over
Bake at 350 degrees for 1 hour or until browning on top and fluffy.


spinach in the pan
spinach 5 minutes later

layers of lovliness


done...wish you could smell it!

The good news about all of this is that, according to my research, there are no clear definitions for egg dishes- so you can name it what you want! 

Monday, March 7, 2011

A Cake Like My Dad

Today is my dad's 70th Birthday! Hard to believe…how could it be? He’s so young- hardly a gray hair on his head.  I am glad to celebrate him.  Our family met together to celebrate with Mexican food (his favorite), cake and gifts!  My dad is more of a food person than a dessert person, but honestly, in the home where he was raised, with my grandmother, and in the home where he lives, with my mom, he couldn’t help but appreciate and enjoy desserts.  These women are baking legends.  My dad would typically prefer a fruit cobbler to a decadent, fancy cake, but there is a birthday cake that has been his favorite for as long as I can remember.  It is an Angel Food Cake sliced into layers, filled and covered with a vanilla custard and iced with fresh whipped cream.  I asked my mom how long it has been his favorite and she said she remembers back in 1965, my great grandmother telling her that she always made this cake because it was my dad’s (her grandson’s) favorite.  So that means that for almost 50 years this has been this man’s cake-of-choice!

Which, you know, when I stop to think about it, really fits my dad.  He is consistent like that. He is strong in his convictions, constant.  He cheers for his ball teams regardless of what kind of season they are having.  He is trustworthy and honest, whether or not anyone is watching. Always dependable.

This cake is a vintage classic, yet memorable and worth repeating...obviously!   I think it makes sense that this is my dad's cake.  It's fun to think that maybe people's birthday cake of choice might very well be a reflection of the kind of person they are.  Do you think that's true for you?

I celebrate you, Dad, and honor your life of integrity, wisdom, steadiness and consistency.
You are tried and true.


1 Angel Food Cake Mix
2 ½ cups milk
4 egg yolks, whole- beaten
1 cup sugar
½ cup flour
1 tsp. vanilla
½ tsp. salt
2 tsp. gelatin, plain
milk (a little)
2 cups whipping cream, divided
sugar (a little)
1 tsp. vanilla

Bake Angel Food Cake in a tube pan according to package. (This is extremely simple.)   Cool upside down in pan.  Meanwhile, heat milk and add beaten egg yolks.  Combine sugar with flour, add to mixture.  Add vanilla and salt.  Mix and cook.  When thick, add gelatin, dissolved in a little milk.
In an electric mixer, whip 1 cup whipping cream on high until thick peaks are formed.  When custard is cool, fold into whipped cream. 
Cut Angel Food cake into 3 round layers, spreading filling between each layer and on top and sides of cake. 
Whip another cup of whipping cream.  Add a little sugar and 1 tsp. vanilla to taste.  Cover the entire cake. 
Keep refrigerated. 
Slice and serve with fresh berries or peaches.

(my mom snapped these photos while making the cake this weekend so you could see some of the process...thanks, mom!)
cooling the cake


slicing the layers (mom used an electric knife)
custard is on
with whipped cream-YUM!